FASHION DESIGNER


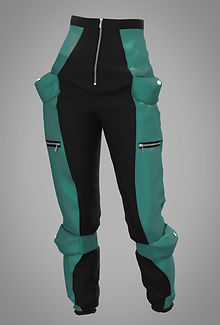
CLO 3D DEVELOPMENT


WL-LOOK6-CJ and WL-LOOK6-CT

TROUSER DEVELOPMENT
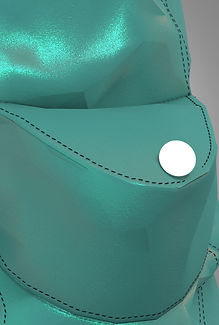
Comparing scanned iridescent silk taffeta fabric and creating the fabric.
JACKET DEVELOPMENT
OTHER GARMENTS

I decided to switch the bottoms and put them with the opposite jackets.
FIRST RENDERS


FIRST ANIMATION
COMMENTS: Once making this animation and comparing, I realised the blue trouser fabric was too bright compared to the actual fabric I chose to use in my collection, so I want to amend this. And I also realised I had missed some top stitching on the back of my jacket. Also I want to do different camera angles in the amended animation.
MAKE DEVELOPMENT


WL-LOOK3-DJ
WL-LOOK3-TD
WL-LOOK3-MT
JACKET
TOILE 1


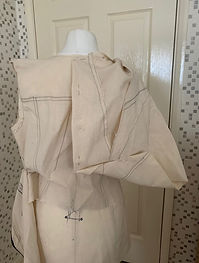
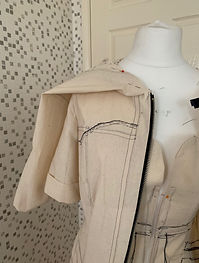
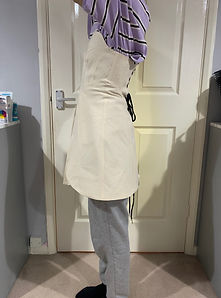
After making my first toile I realised the design and silhouette was too simplistic and was not pleased, so decided to redesign the details and develop the silhouette from this first toile. Firstly I marked the lowering the high neckline in the 4th photo, with thoughts to add a cadet collar or a hood. To develop the silhouette I'm going to drape and explore potential sleeve shaping's as well as developing the shape of the main body of the jacket. I also made a note to prioritise topstitching on the industrial sewing machine rather than a domestic because I am able to get more accurate lines.


Whilst developing I decided to have a raglan sleeve and to create more volume in the sleeve a bit like a bishop sleeve. I draped with old denim garments because denim was potentially the final fabric I had in mind so I thought I'd get a more reliable silhouette and idea of how the final fabric would fall. I explored possible sleeve shapes and developed that into a paper pattern and tested, and liked. I wasn't sure if I wanted a cadet collar or an oversized hood or if I could incorporate both some how. In adding a cadet collar I'd have to source a longer zipper but I wanted to utilise the one I already had so decided to focus on draping a hood for the time being. Also I like gathering/pinning the jacket at the waist to create shape but this pinning would make the zipper unfunctional so perhaps a belt and belt loops could be used instead of pinning.


In developing the hood I had the tail of an orca in mind linking back to my concept, using a zipper to interchange between the functional hood and the decorating tail that exaggerates the silhouette. The size of the hood causes some drooping in the centre when the hood is in use so adding a pull cord may be able to reduce the amount of drooping.


FINAL MAKE


MANUFACTURING SEQUENCE
1- Cut fabric
2- Flat stitch upper and lower bodice panels (waist seam). Press seams.
3- Install inseam pocket.
4- Feld stitch front panels together and back panels together. Press seams.
5- Feld stitch front and back yokes to bodice pieces. Press seams.
6- Feld stitch the side seams. Press seams.
7- Sew curved back panel, press and overlock
8-Overlock waist seam, press, edge stitch down.
9-Feld stitch CF strip panels to front bodice panels.
10- Topstitch pockets and pocket flaps to sleeves, as well as straps and buckles.
11- Sew sleeve darts and sleeve seam.
12- Install raglan sleeves.
13- Attach cuffs and press upperwards.
14- Install CF zipper
15- Install eyelettes on hood
16- Assemble hood, bag out with zipper and pull cord in place.
17- Flat stitch binding to facing
18- Attach facing to inside of jacket, press and tack in place.
19- Press 4cm hemline, and coverstitch

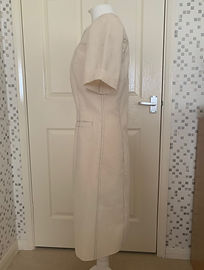
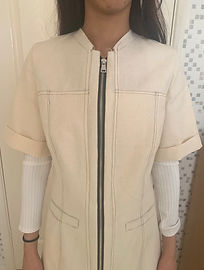
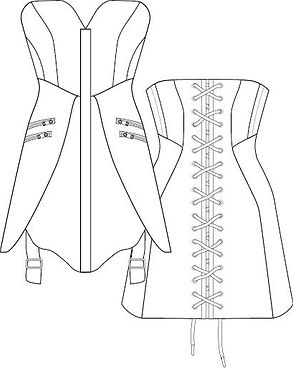
CORSET DRESS
TOILE 1


Beginning the development of my dress I used draping tape to mark my shapes on the dress form and modelled against those. Once putting my first toile together again I found this toile too simplistic than I first anticipated. There were some issues with fit around the bodice and at this point I was still unsure of details such as fastenings and the shape of the hem.
TOILE 2


For my second toile I attempted to amend the fitting issues. I thought the bodice neckline was too lower so I extended it by approximately 5cm all around so the waistline sat better on me, I also took another look at the bodice panels and made some more changes to achieve a better fit. I thought it would benefit by adding a small dart. At this point I wanted the dress to lace up at the back but was not sure if it was necessary to lace only half way or to the hemline of the dress. I also changed the details of the skirt and hemline. Once the second toile was made there were still issues with fit on the bodice, and the effect I got from the hemline was not what I was trying to achieve. We worked on more amendments to work on for the 3rd toile.
Notes to take forward: Rotate dart out of bust point; Extend lacing the hem of dress; Adjust shaping of bodice panels; Skirt was redraped against the bias rather than the grainline; Extend modesty panel; Reworked waistline to remove seam; Adjust hemline shape


TOILE 3


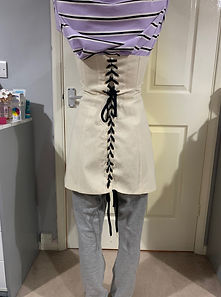
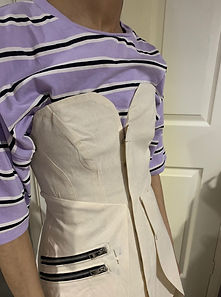
This 3rd toile is a lot better and I am now happy to move onto the final make. I just want to note that I need to confirm my manufacturing sequence because I ran into some issue with how everything best went together. I want to extend the front panel at the side just to be sure I don't have any gapping like in the 2nd toile at the hemline. The decorative strap is quite unnoticeable here so I want to extend this a little bit so the buckle can be seen more clearly. I also do not like the how bulky the lacing is at the back so I'm going to make a more dainty lacing from possibly a satin binding tape.
FINAL MAKE


MANUFACTURING SEQUENCE
1-Bag out busk fly front, press and edgestitch, overlock open edge.
2-Bag out CF panels (outer shell & lining), leaving holes for busk, topstitch to hold busks in place.
3- Topstitch busk fly front to cover CF.
4- Flat stitch bodice panels together, lining and outer shell fabric. Press seams. Stitch lining and outer shell together by the top edge, press.
5- Install boning into bodice.
6- Stitch bodice panels to CF panels.
7- Flat stitch skirt panels together, press.
8- Install welted zipper pockets.
9- Bag out skirt pieces (outershell & lining), press.
10- Stitch skirt to bodice, press, overlock edge.
11- Attach CB panels to dress and press flat.
12- Bind CB edge.
13- Install eyelettes.
14- Attach and topstitch modesty panel.
15- Lace up corset back.
16- Edgestitch hoop and eye tape to rest of length of dress on CF.
17- Bag out straps, press, edgestitch.
18- Position and attach straps in place and pull through buckles.
MESH TOP
TOILE 1


MANUFACTURING SEQUENCE
1- Stitch shoulder seams and side seams with 4-thread overlocker
2- Stitch sleeve seams with 4-thread overlocker
3- Install sleeves with 4-thread overlocker.
4- Finish neckline, hem and cuffs with a stretch binding.


