Specifications
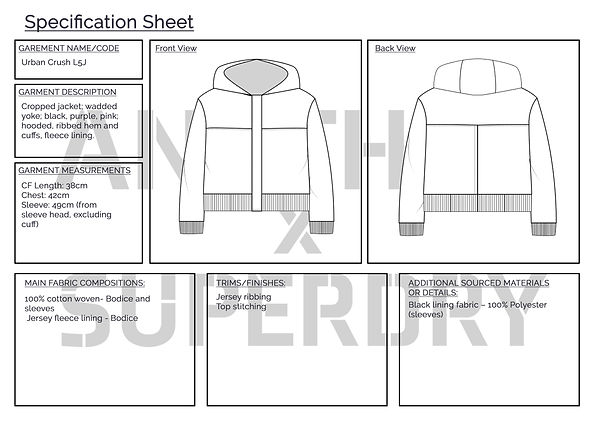

Product construction
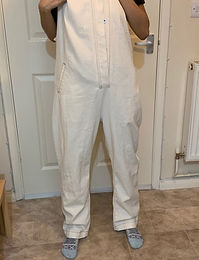
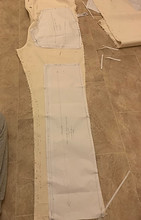
These pictures show the fit of the size 12 jumpsuit. I was concerned about whether there would be enough fabric do to the panels and felded seams in my design. I thought the best route to take would to be to seam-rip the seams completely and decide when I had developed my patterns.


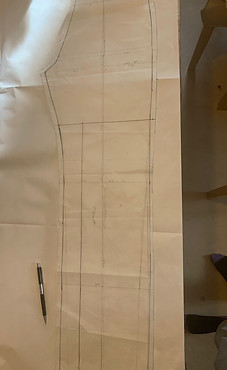
pattern development


I had a pair of jeans that I liked the fit of so I made the decision to draft my pattern from these. I stretched and pinned the jeans to some cardboard and took measurements to create my master pattern. I wanted straight legged trousers with panels and felded seams and I created these patterns using the master pattern that I made from the jeans.


TOILE

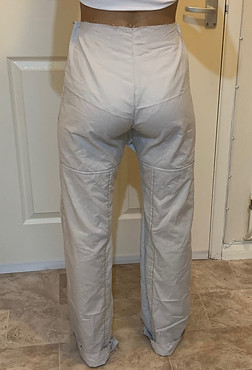


I toiled the trouser pattern to ensure fit. There was some inaccuracy when I drafted the front inner leg, so once seeing the excess fabric and comparing the front and back pattern measurements I saw where I may have originally stretched the jeans out too much. I adjusted the front pattern to match the back pattern. Approximately 2-3cm was taken away from the waist. Also some length was taken from the hem because I wanted a 4cm hem allowance and I thought there was excess however I later realised this was a mistake and was only able to have a 1cm hem allowance.
The original trouser legs of the jumpsuit were not wide enough for both of my panel pattern pieces to fit. I therefore sourced a white cotton shirt to create the smaller leg pieces.
I positioned the upper trouser piece aligned with the original welted pockets of the jumpsuit.


Manufacturing
After cutting out and dyeing fabric
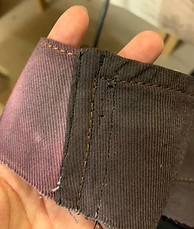
1. Join lower inner and outer trouser pieces together with a felded seam and top stitch. (Front and Back)
2. Do a felded seam to join the lower trouser pieces to the upper panels forming the full leg pieces and top stitch. (Front and Back)
3. Join the front and back pieces together by the side seams; felded and top stitch.
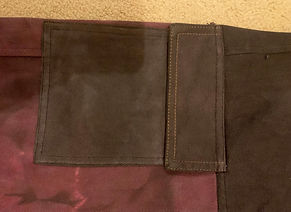
4. Position and top stitch patch pockets on sides.
5. Flat stitch centre back and overlock edges.
6. Overlocked centre front edges and join ready for fly front.
7. Assemble fly front into centre front.

8. Flat stitch the middle leg seam and overlock and top stitch.
9. Overlock and hem
Waistband: Pieces used; jumpsuit collar and cuffs
1. Using waist measurement, join the 2 cuffs to the collar with the collar in the middle. Trimming the excess to be used for textile embellishment


2. The depth will be quite big so trim reasonably.
3. Overlock and top stitch

3. Use scrap from cuffs to create textile embellishment and top stitch onto waistband


4. Flat stitch waistband to trousers and overlock.
5. Button and buttonhole.


Evaluation:
I was very happy with how the fabric dyed and think the combination of tone and colour works well.
The use of felded seams ensures the strength of the seams and I also like the topstitch detailing.
I utilised the components of the original jumpsuit in this garement; patch and welted pockets; cuffs and collar for waistband.
I am not pleased with the finishing hem depth which I would have liked to be about 4cm rather than 1cm.
The position of the welted pockets are closer to the centre front than I would like.
When attaching the waistband I think a binding finish would be nicer that the overlocked finish.
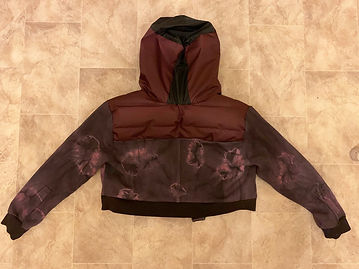
Jacket
To make the jacket I began by draping and pinning pieces together on the stand. Firstly I adjusted the neckline of the original jumpsuit yoke to match the hood measurement. I then used the yoke as a pattern for the new wadded yoke.


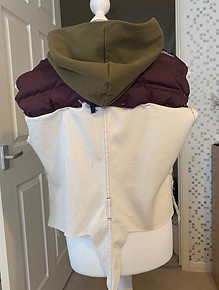

Pinning all the pieces together on the stand allowed me to draft the length of the jacket and the pin the ribbing. I decided the jacket was a bit big so I removed approximately 2-4cm from the centre front instead of the side seams to avoid affecting the armhole size since I wanted to use the original sleeves.
Manufacturing
After cutting out and dyeing fabric.
Outer:
1. Flat stitch wadded yokes to bodice pieces then topstitch. (Front and Back)
2. Flat stitch shoulder and side seams.

3. Topstitch plackets closed on sleeves.
4. Set in sleeves
5. Flat stitch ribbing to cuffs and hem.
Lining:
1. Flat stitch shoulder and side seams.
2. Flat stitch sleeve seam.
3. Set in sleeves.
6. Join hood outer and lining together, bag out.
7. Join the main body outer shell and lining together by the ribbed cuffs and hem.

8. Topstitch the button stands back on.
9.Attach all layers of hood to bodice outer shell.
10. Seam rib an opening in the sleeve lining to be able to finish attaching hood and bag out.


Evaluation:
I like the combination of the textures of the wadded yoke and dyed cotton. The addition of the fleece lining allows this to be a warm functional coat.
I am happy that I decided to make the hood from the casing fabric of the wadded panel and fleecing rather than just dyeing the khaki green hood from the jumper, I'm glad I used it as a pattern instead.
I made the mistake not dyeing all the fabric pieces at the same time, so there is some inconsistency with the effect of the dye on the bodice. I am glad that I used the original button stand and buttons however with the added fleece lining and layers of the button stand it was very thick which made it hard to sew. So a zipper may have been a better option in reducing these problems.
Branding Development

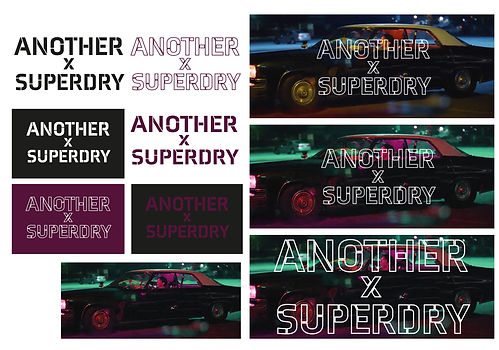
Labelling
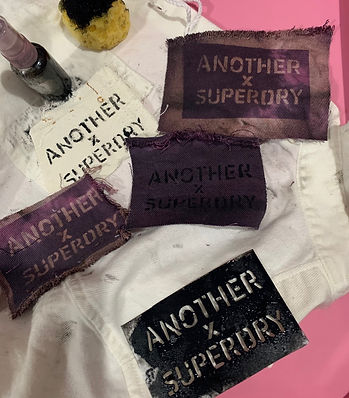
In developing my labels, I made a stencil from card and scalpel. I experimented by applying paint with a sponge through the stencil which didn't have the clean finish which I was expected. I then tried applying the paint with a brush which was neater but still not quite what I wanted. I then tried spraying bleach through the stencil onto some scrap dyed fabric which had the perfect effect so I used this technique for all my labels.


